PTCL introduces DSL service for our valued subscribers. We are committed to
provide you quality internet services. Please follow the installation instructions and
log on to your ADSL broadband link.
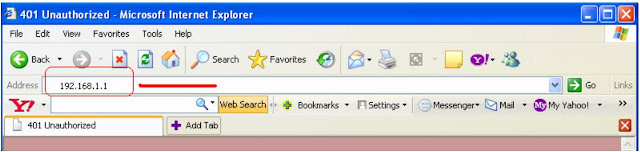
Step#1. DHCP is enabled by default; there is no need for IP settings in LAN connection. Open Internet Explorer and write “192.168.1.1” in address bar and press enter. There must not be any proxy setting in the internet Explorer.
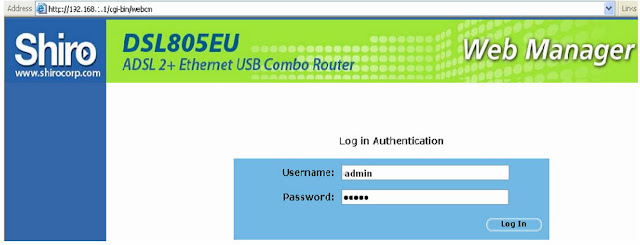
Step#2. Following Screen will appear. Enter the Username: admin & Password: admin and press Login.
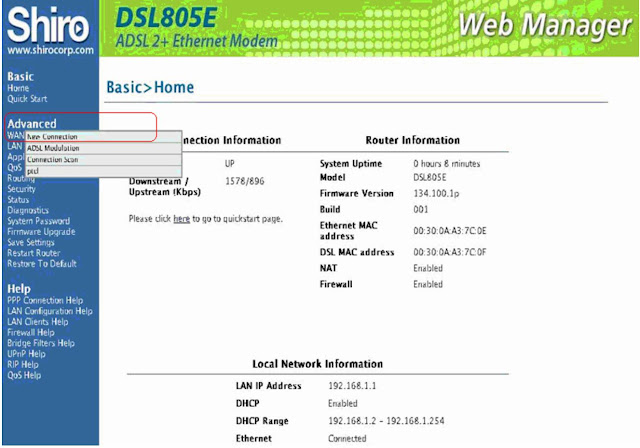
Step#3. Click on “Advanced” option and then on “New Connection”.
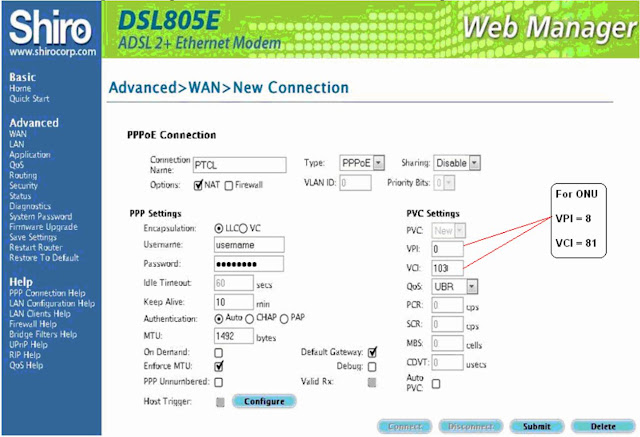
Step#4. Following window will be shown, make the settings as given in the figure below. After
making the settings click “Submit” button to save the settings.
Step#5. Click on LAN and then on LAN Configuration and press submit button to save settings.
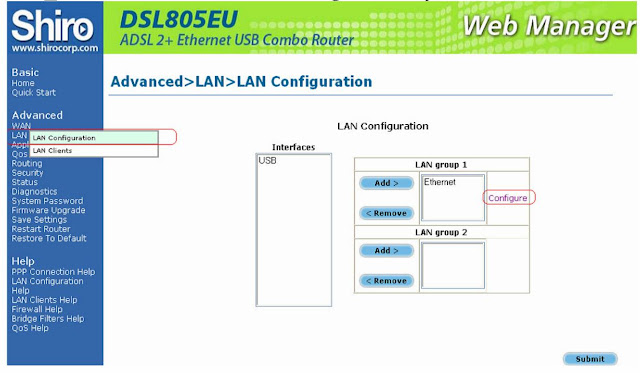
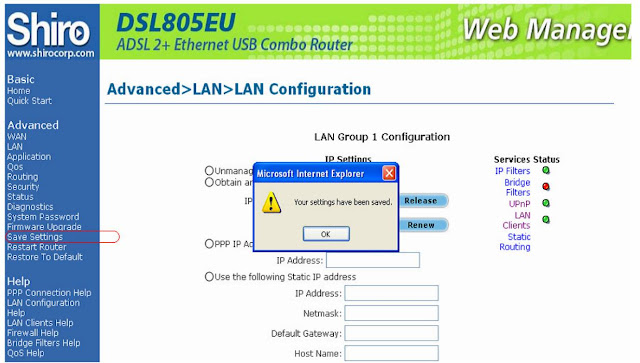
Step#6. Following window will be shown by clicking the configure button. Press Submit to save
the settings.

Step#7. Go to Save Settings option and click OK to save the changes.
Your installation is completed. Browse any web site to check the successful installation.
provide you quality internet services. Please follow the installation instructions and
log on to your ADSL broadband link.
 |
| ptcl_logo.svg_png |
Step 1: Connecting to the Splitter, Power Connection & LAN cable.
 |
| PTCL_Broadband_Pakistan.svg_png |
- Line hole connects to PTCL wire or Wall phone Jack (RJ-11 Jack).
- Modem hole connects to the DSL jack of the ADSL CPE (Customer Premises Equipment).
- Phone hole connects to a telephone set.
- Connect the Power Adapter to the AC power plug and attach the connector of adapter to the CPE and switch it on.
- Attach one end of LAN wire (RJ-45) to the LAN interface of CPE and the other end to the LAN wire to the LAN interface of computer’s LAN card.
- Link Indicator lights will lit up and show the connectivity. ADSL light will start blinking and soon will be static as a sign of connectivity with our system, if the line is properly jumpered in PTCL premises with the DSLAM (Digital Subscriber Line Access Multiplexer).Joint less and direct cable line from the nearest PTCL pole or cabinet must be connecting to your splitter and then all the phone extensions must be taken from the phone hole of splitter. The Drop wire distance from PTCL pole or Cabinet must not be ideally more than 50 meters.(Twisted pair wire can be longer)
Step 2: ADSL Configuration in CPE and Computer
Step#1. DHCP is enabled by default; there is no need for IP settings in LAN connection. Open Internet Explorer and write “192.168.1.1” in address bar and press enter. There must not be any proxy setting in the internet Explorer.

Step#2. Following Screen will appear. Enter the Username: admin & Password: admin and press Login.

Step#3. Click on “Advanced” option and then on “New Connection”.

Step#4. Following window will be shown, make the settings as given in the figure below. After
making the settings click “Submit” button to save the settings.

Step#5. Click on LAN and then on LAN Configuration and press submit button to save settings.

Step#6. Following window will be shown by clicking the configure button. Press Submit to save
the settings.

Step#7. Go to Save Settings option and click OK to save the changes.

Your installation is completed. Browse any web site to check the successful installation.


Post a Comment